
Terminals are Colorful and Beautiful with Powerlevel10k (macOS Tahoe 2026 Update)
Published on Aug 31, 2026
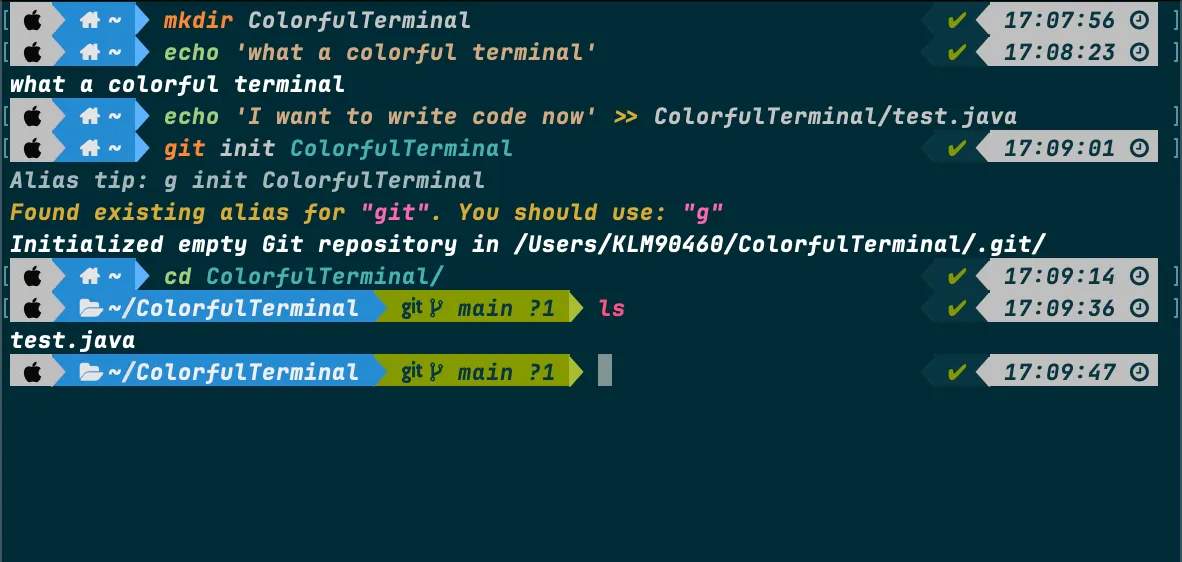
Are you tired of the boring, monochrome terminal on your Mac? Do you want to add some flair and personality to your command-line interface? Look no further than Powerlevel10k, a powerful and highly customizable Zsh theme that can transform your terminal into a visual masterpiece.
In this article, we’ll walk you through the step-by-step process of installing and configuring Powerlevel10k on your macOS system, so you can enjoy a beautiful and functional terminal experience.
If you have medium account, you can access the content in medium. https://medium.com/codimis/terminals-are-colorful-and-beautiful-with-powerlevel10k-624594a2cc6f
Prerequisites
Before we begin, make sure you have the following installed:
Step 1: Install Homebrew (if not already installed)
Homebrew is a package manager for macOS that makes it easy to install software packages.
Open your terminal and paste the following command to install Homebrew:
/bin/bash -c "$(curl -fsSL https://raw.githubusercontent.com/Homebrew/install/HEAD/install.sh)"Step 2: Install Zsh (if not already installed)
Zsh (Z shell) is a feature-rich shell that provides an array of improvements and additional functionalities over the default Bash shell. It offers advanced tab completion, customizable prompts, powerful scripting capabilities, and much more.
Every new Mac uses the Z shell (Zsh) by default, so Zsh may already be installed on your system. You can check your Zsh version with:
zsh --versionThe output should look something like this:
zsh 5.9 (arm64-apple-darwin25.0)If you don’t get this output, Zsh needs to be installed. You can use a package manager like Homebrew or follow the installation instructions from the official Zsh Website.
Install Zsh using Homebrew with the command below:
brew install zshStep 3 (Optional): Install iTerm2
iTerm2 is widely favored by developers for its extensive capabilities and flexibility. You can easily download and install iTerm2 by visiting its official website or by running:
brew install iterm2iTerm2 offers a rich set of features, such as split panes, hotkey navigation, and advanced customization, making it a top choice for those seeking a powerful terminal emulator.
Step 4 (Optional): Set Zsh as Your Default Shell
If Zsh is not installed in your system, you are probably using another shell as a default. You need to update it to continue. Run the following command to use Zsh as your default shell
chsh -s /bin/zshStep 5: Install Oh My Zsh
Oh My Zsh is a community-driven framework for managing Zsh configurations. It comes with many plugins and themes, including Powerlevel10k.
You can check whether it’s already installed by running:
omz versionIf it’s not installed, install Oh My Zsh by running:
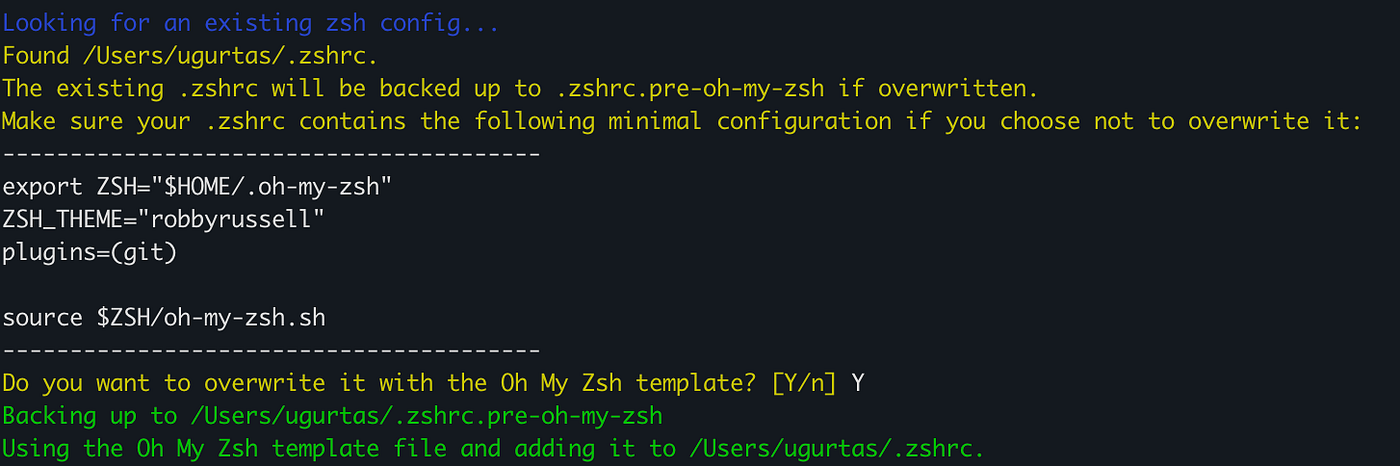
sh -c "$(curl -fsSL https://raw.githubusercontent.com/ohmyzsh/ohmyzsh/master/tools/install.sh)"Oh My Zsh may ask to update your .zshrc file or override it. If you allow it, your old file will be placed at the location shown by the installer. You can copy its contents back afterward.
Step 6: Install a Nerd Font
Powerlevel10k uses special characters and symbols in its prompt, so you’ll need to install a special font to see these characters correctly. The recommended font is Meslo Nerd Font, available on GitHub. You can also explore other Nerd Fonts at nerdfonts.com/font-downloads.
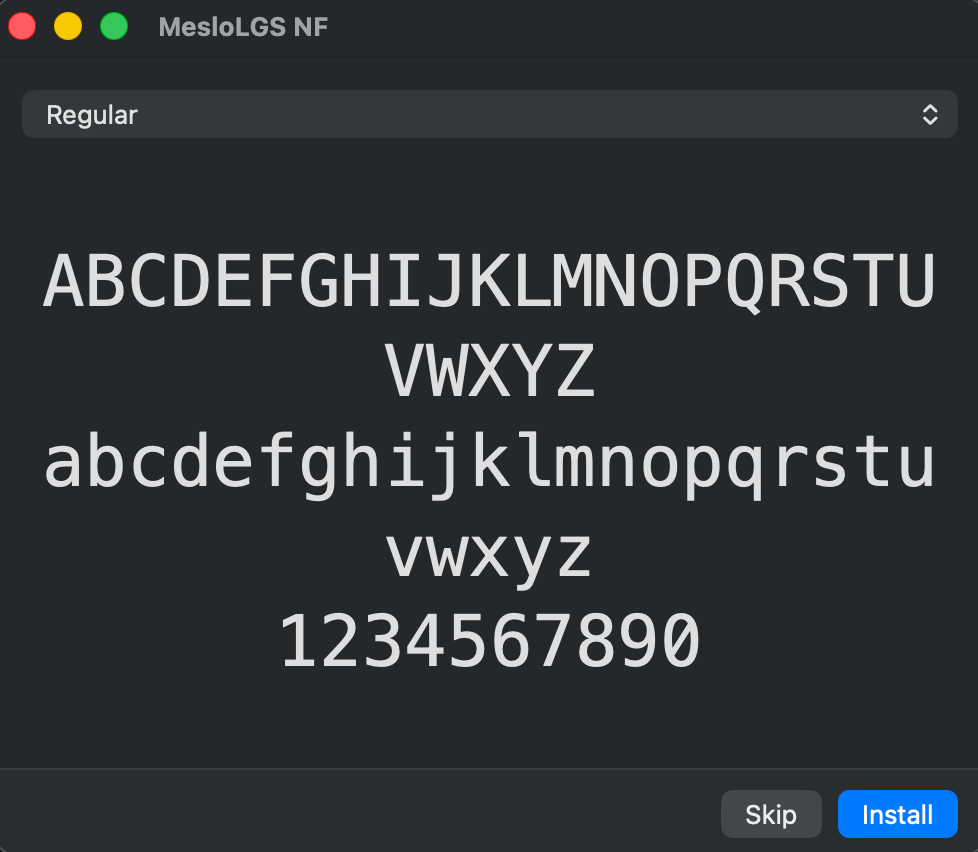
Download all four font files, then double-click each one to install it on your Mac. After installing the first font, you may see options to replace or keep both — choose keep both so you don’t lose any previously installed fonts.
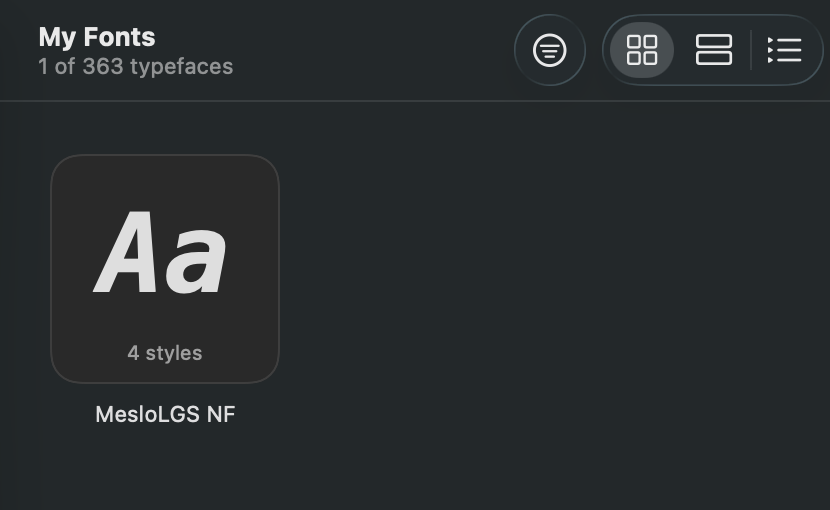
I installed Meslo and JetBrains fonts. You can see all installed fonts in Font Book application. Click My Fonts and it will list the fonts that you installed.
Step 7: Install the Powerlevel10k Theme
Now install the Powerlevel10k theme for Oh My Zsh. This theme provides a highly customizable and colorful prompt.
Clone the Powerlevel10k repository:
git clone --depth=1 https://github.com/romkatv/powerlevel10k.git "${ZSH_CUSTOM:-$HOME/.oh-my-zsh/custom}/themes/powerlevel10k"Step 8: Configure Zsh
Edit your ~/.zshrc file to set the theme to Powerlevel10k.
Open ~/.zshrc in a text editor (nano, vim, or any editor you prefer):
nano ~/.zshrcFind the line that starts with ZSH_THEME and change it to:
ZSH_THEME="powerlevel10k/powerlevel10k"After updating .zshrc, source your dotfile:
source .zshrcMake sure you’re in the right directory when running this command, otherwise you’ll get this error:
source: no such file or directory: .zshrcStep 9: Update Your Terminal Font
After finishing the configuration, you need to set the font in the terminal that you use. You need to set the new font in your terminal application to be able to properly configure powerlevel10k. Your font should be already installed. Hence you need to complete step 5 already.
Most terminals have an option to change the font in the settings or preferences under the “profile” section. Setting the Meslo Nerd Font in your terminal will ensure that Powerlevel10k’s prompt looks correct with all the special characters and symbols.
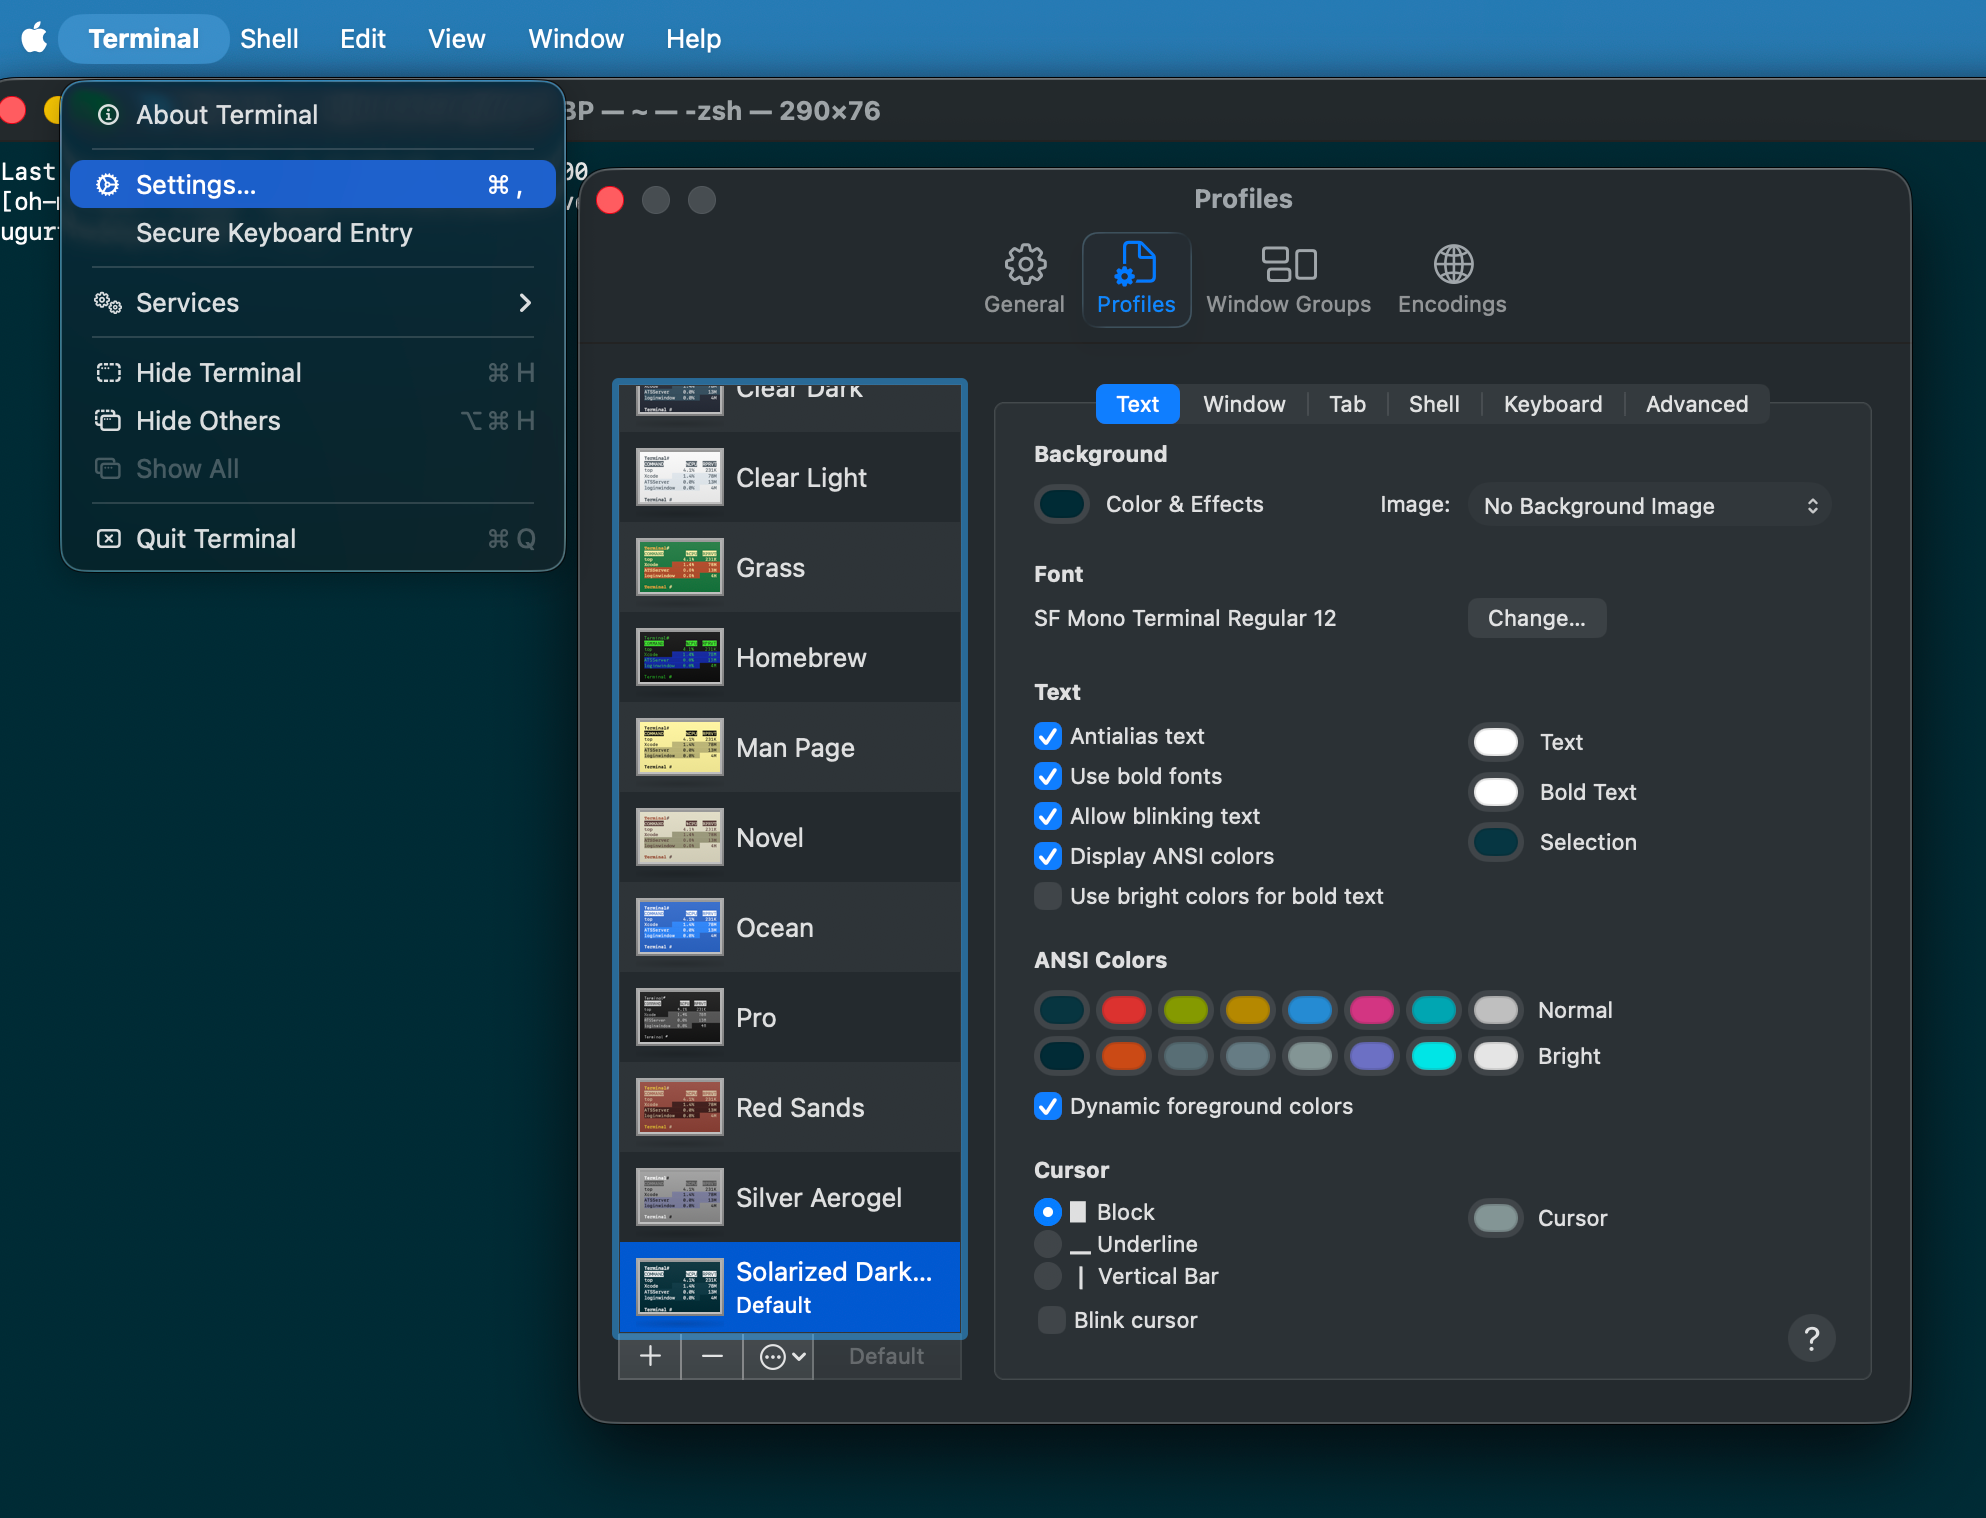
macOS Terminal:
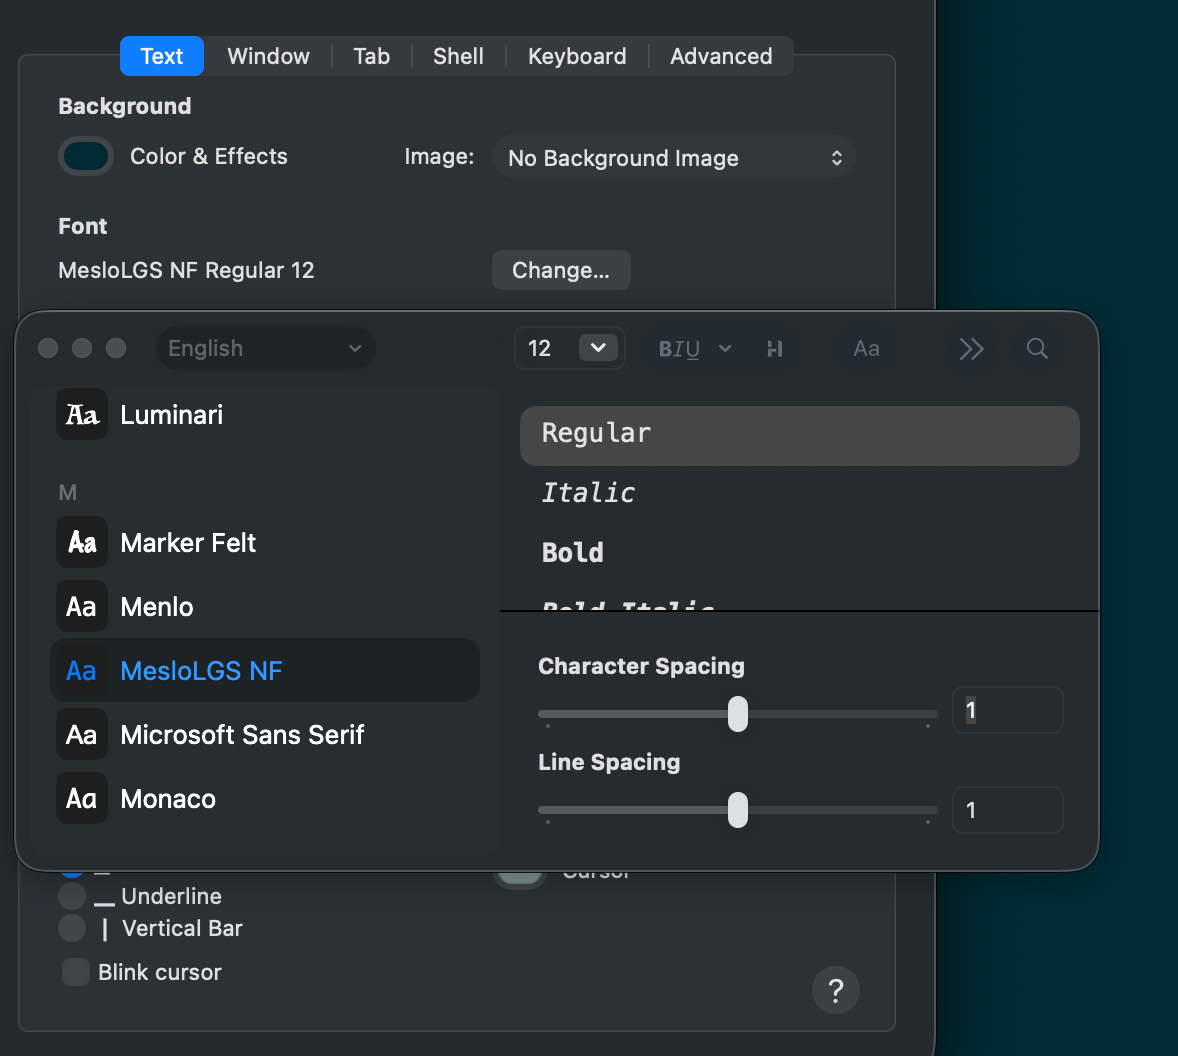
Go to Terminal > Settings > Profile > Text, then click the change button and select your installed Nerd Font.
Then click the change button and select installed Nerd Font.
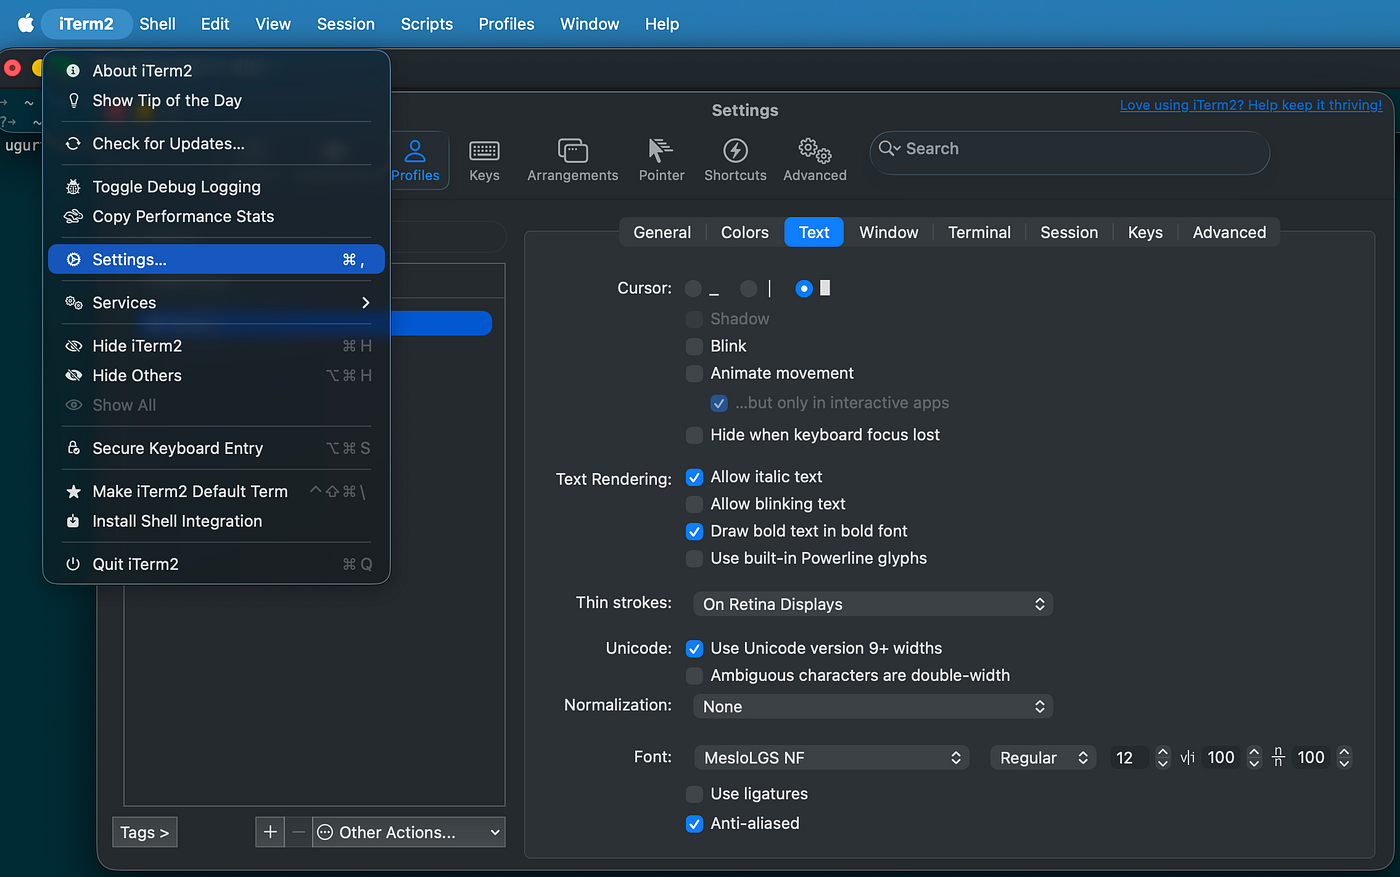
iTerm2:
Go to iTerm2 > Settings > Profiles > Text.
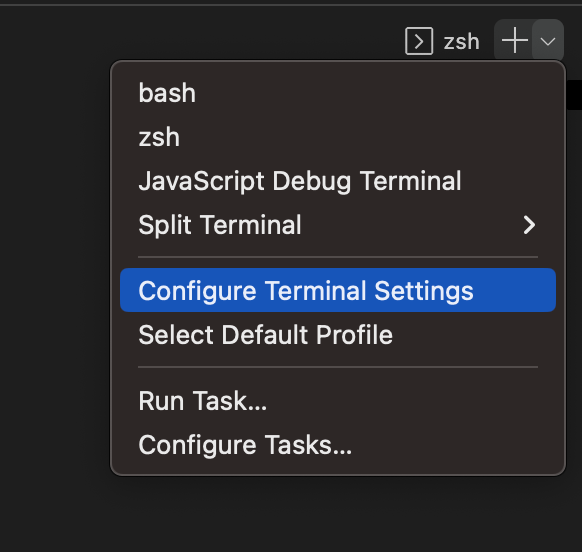
VS Code:
Font configuration is a bit hidden. Open the terminal panel, click the arrow next to the plus button, then choose Configure Terminal Settings. In the settings that open, search for “font” and add your installed font to the list. You can double-check the exact font name in the Font Book app.

Step 10: Set Up Powerlevel10k
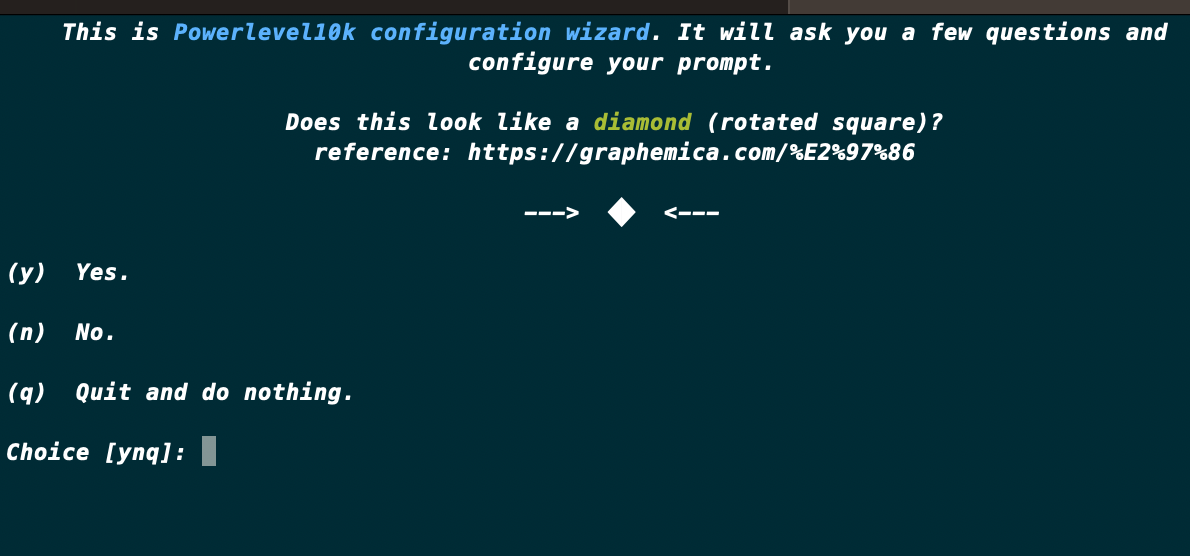
Once Powerlevel10k is installed and your terminal’s Nerd Font is set, run the following command to launch the setup wizard:
p10k configureThis wizard walks you through a multi-step configuration process to customize colors, icons, and prompt segments.
If you don’t see the theme change in the terminal and you get below output
zsh: command not found: p10k…simply restart your terminal.
Follow the prompts to choose your preferred prompt style, icons, colors, and more to create a personalized, visually appealing terminal prompt.
Step 11: Change the Theme
If you want to change your terminal’s color theme, explore options from sites like iTerm2 Color Schemes, which offers a wide range of themes for iTerm2 along with installation instructions for different terminals.
One highly recommended theme is Solarized Dark, which gives your terminal a sleek, modern look. It’s a personal favorite — all the screenshots in this guide were taken using a terminal with the Solarized Dark theme.
Step 12: Enjoy Your Colorful Terminal!
Congratulations! Your terminal should now have a sleek and colorful Powerlevel10k prompt. You can further customize it by editing the ~/.p10k.zsh file, which is created after running the configuration wizard.
With Powerlevel10k, you can unleash your creativity and make your terminal truly your own. Experiment with different color schemes, icons, and segments to build a personalized, visually stunning command-line experience.
Happy terminal tinkering and productivity boosting!
Stay Connected! 🚀 For more engaging articles, make sure to follow me on social media:
Related Posts
View All Posts »
Java Concurrency and Multithreading
Understanding concurrency and multithreading is crucial for developing high-performance Java applications.